
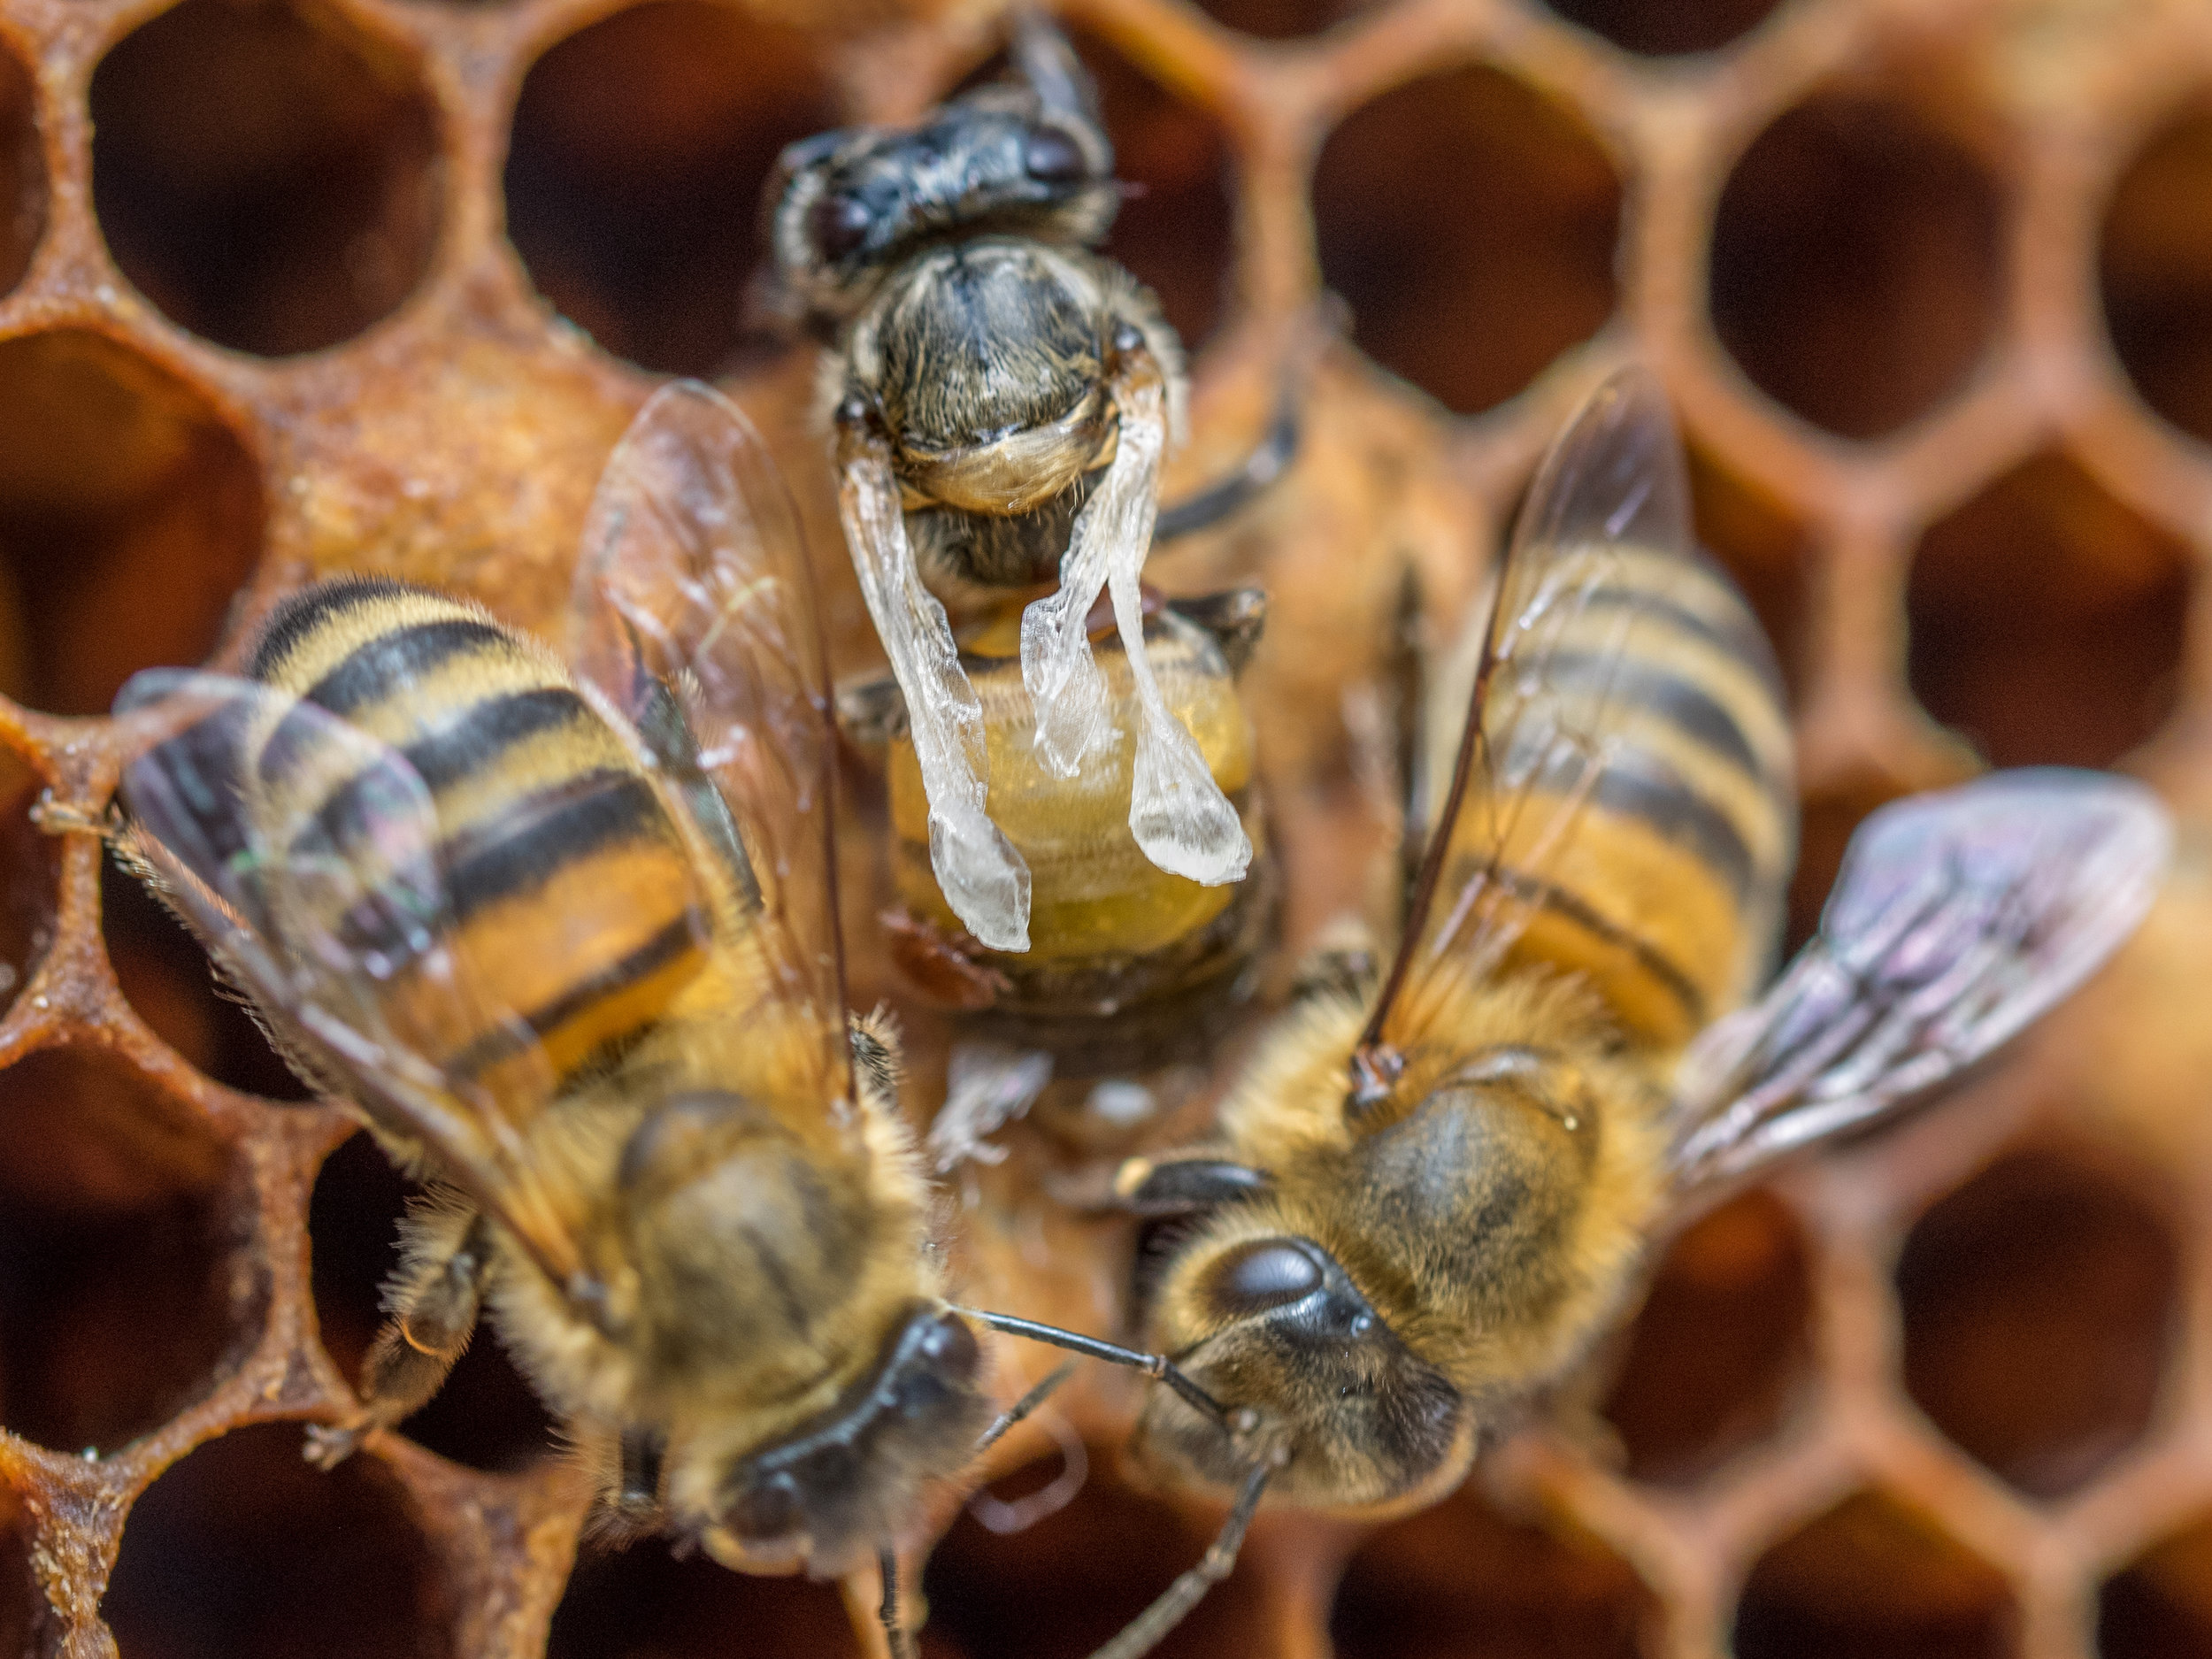
Colony losses got you down? It’s no secret that varroa mites are a huge contributing factor (1, 2, 3). Anecdotally, I’d say 9 out of 10 times we or our clients lose hives, varroa mites were the primary cause. Even if you aren’t seeing mites on your bees, you can trust that they are there, lurking beneath the surface. Phoretic mites (free-moving phase of their life cycle where they are transmitted between hives from bee to bee) will most often wedge themselves between abdominal segments on the underside of adult bees, and breeding mites (most of the mite population in a hive) are safe and snug, concealed within developing brood cells. If you do happen to see phoretic mites on your bees, you can be pretty darn sure you have a problem, and it’s time to consider your treatment options.
Varroosis, or parasitic mite syndrome (PMS), occurs when high mite loads weaken bee immunities and increase the presence of varroa-vectored viruses. When immunosuppressed, bacterial and fungal spores naturally present in the hive begin making them ill (think staph infections). Additionally, this weakens their defenses against robbing bees and predators like yellowjackets.
The Handy-dandy List of Varroa-vectored Viruses
Acute bee paralysis virus (ABPV): bees appear shiny or greasy, tremble, and cannot fly well
Deformed wing virus (DFW): bees emerge with shriveled wings
K-wing virus: the hooks between the two sets of wings are degraded causing the wings to split apart
Black queen cell virus: developing queens within their cells turn black
The only effective way to deal with these problems is to knock back mite populations. But, by the time you notice symptoms of these viruses, it is often too late to save the colony without eliciting the use of chemical miticides. Thus, the key lies in preventing mite populations from gaining a foothold, ideally while avoiding breeding stronger mites by overtreating with miticides.
If you haven’t read our IPM post, I’d recommend checking it out now, but in short, the goal isn’t to wipe out mites from our hives entirely; that would be an unreasonable expectation. Instead, we aim to keep mite populations below a threshold of hive injury.
Monitoring
The most informative tool we have in our IPM toolkit is monitoring. This allows us to keep tabs on mite populations at critical stages of the season. Once mite populations reach thresholds where hive survival is threatened, we can respond with any number of cultural, mechanical, biological, and (as a last resort) chemical treatments.
Thresholds
Acceptable numbers of mites will be different at different stages of the beekeeping season. This is based on population size, the presence of brood, and seasonal behaviors (e.g. robbing). You will want to measure mite levels in your hive at least once in the summer, once in the fall, and as a follow up to any chemical or non-chemical treatment you use to make sure it is working. In the spring you will use hive health as the indicating factor of whether you have a mite issue or not. If you do indeed notice signs of mites (viral symptoms, bald brood, brood disease, deteriorating queen health, etc.), you should confirm your suspicions with one, or a combination, of the methods described below.
Acceptable Mite Infestation Rates
Spring (March - May in PNW): <3%
Summer (June - August in PNW): <5%
Fall (August - October in PNW): <3%
Monitoring Method #1: Sticky Boards
The most popular (and most passive) method of monitoring for mites is to count natural mite drop on a sticky board. When using a screened bottom board with an insert, beekeepers can count the number of mites that drop to the bottom of the hive within a certain time period. You can estimate the percent infestation rate based on the number of mites that naturally drop in 1 day.
Here’s how you do it:
Draw a grid, or purchase a gridded insert for your screened bottom board
Coat the insert in a sticky substance like Vaseline or vegetable oil so any mites that drop onto the insert get stuck
Count (and note!) the number of mites on the insert every 2-3 days for 2 weeks
Use that data to estimate the average mite drop per day
If mite drop count exceeds 3 mites/day in spring and fall or 5 mites/day in summer, use a more accurate method of monitoring to confirm whether or not you have a problem.
Author's note: Determining acceptable mite drop is an extremely grey area in the hobby, and there are no steadfast rules. Mite drop will be based on more than the number of mites in the colony. You will also have to consider the size of the colony, the genetics and hygienic behaviors of your particular bee strain, whether they are going through a broodless phase or not, among other factors.
That being said, if you have a screened bottom board, it doesn’t hurt to keep tabs on mites this way. Just be sure you recognize your results will be, more or less, rough approximations. Additionally, sticky boards are great for determining whether a treatment you are using is working. You’d expect to see a higher mite drop through the duration of the treatment, and then a lower mite drop after the treatment is completed.
Monitoring Method #2: Sugar Roll & Alcohol Wash
Jar methods of mite monitoring are more accurate than sticky boards but do require a little more preparation.
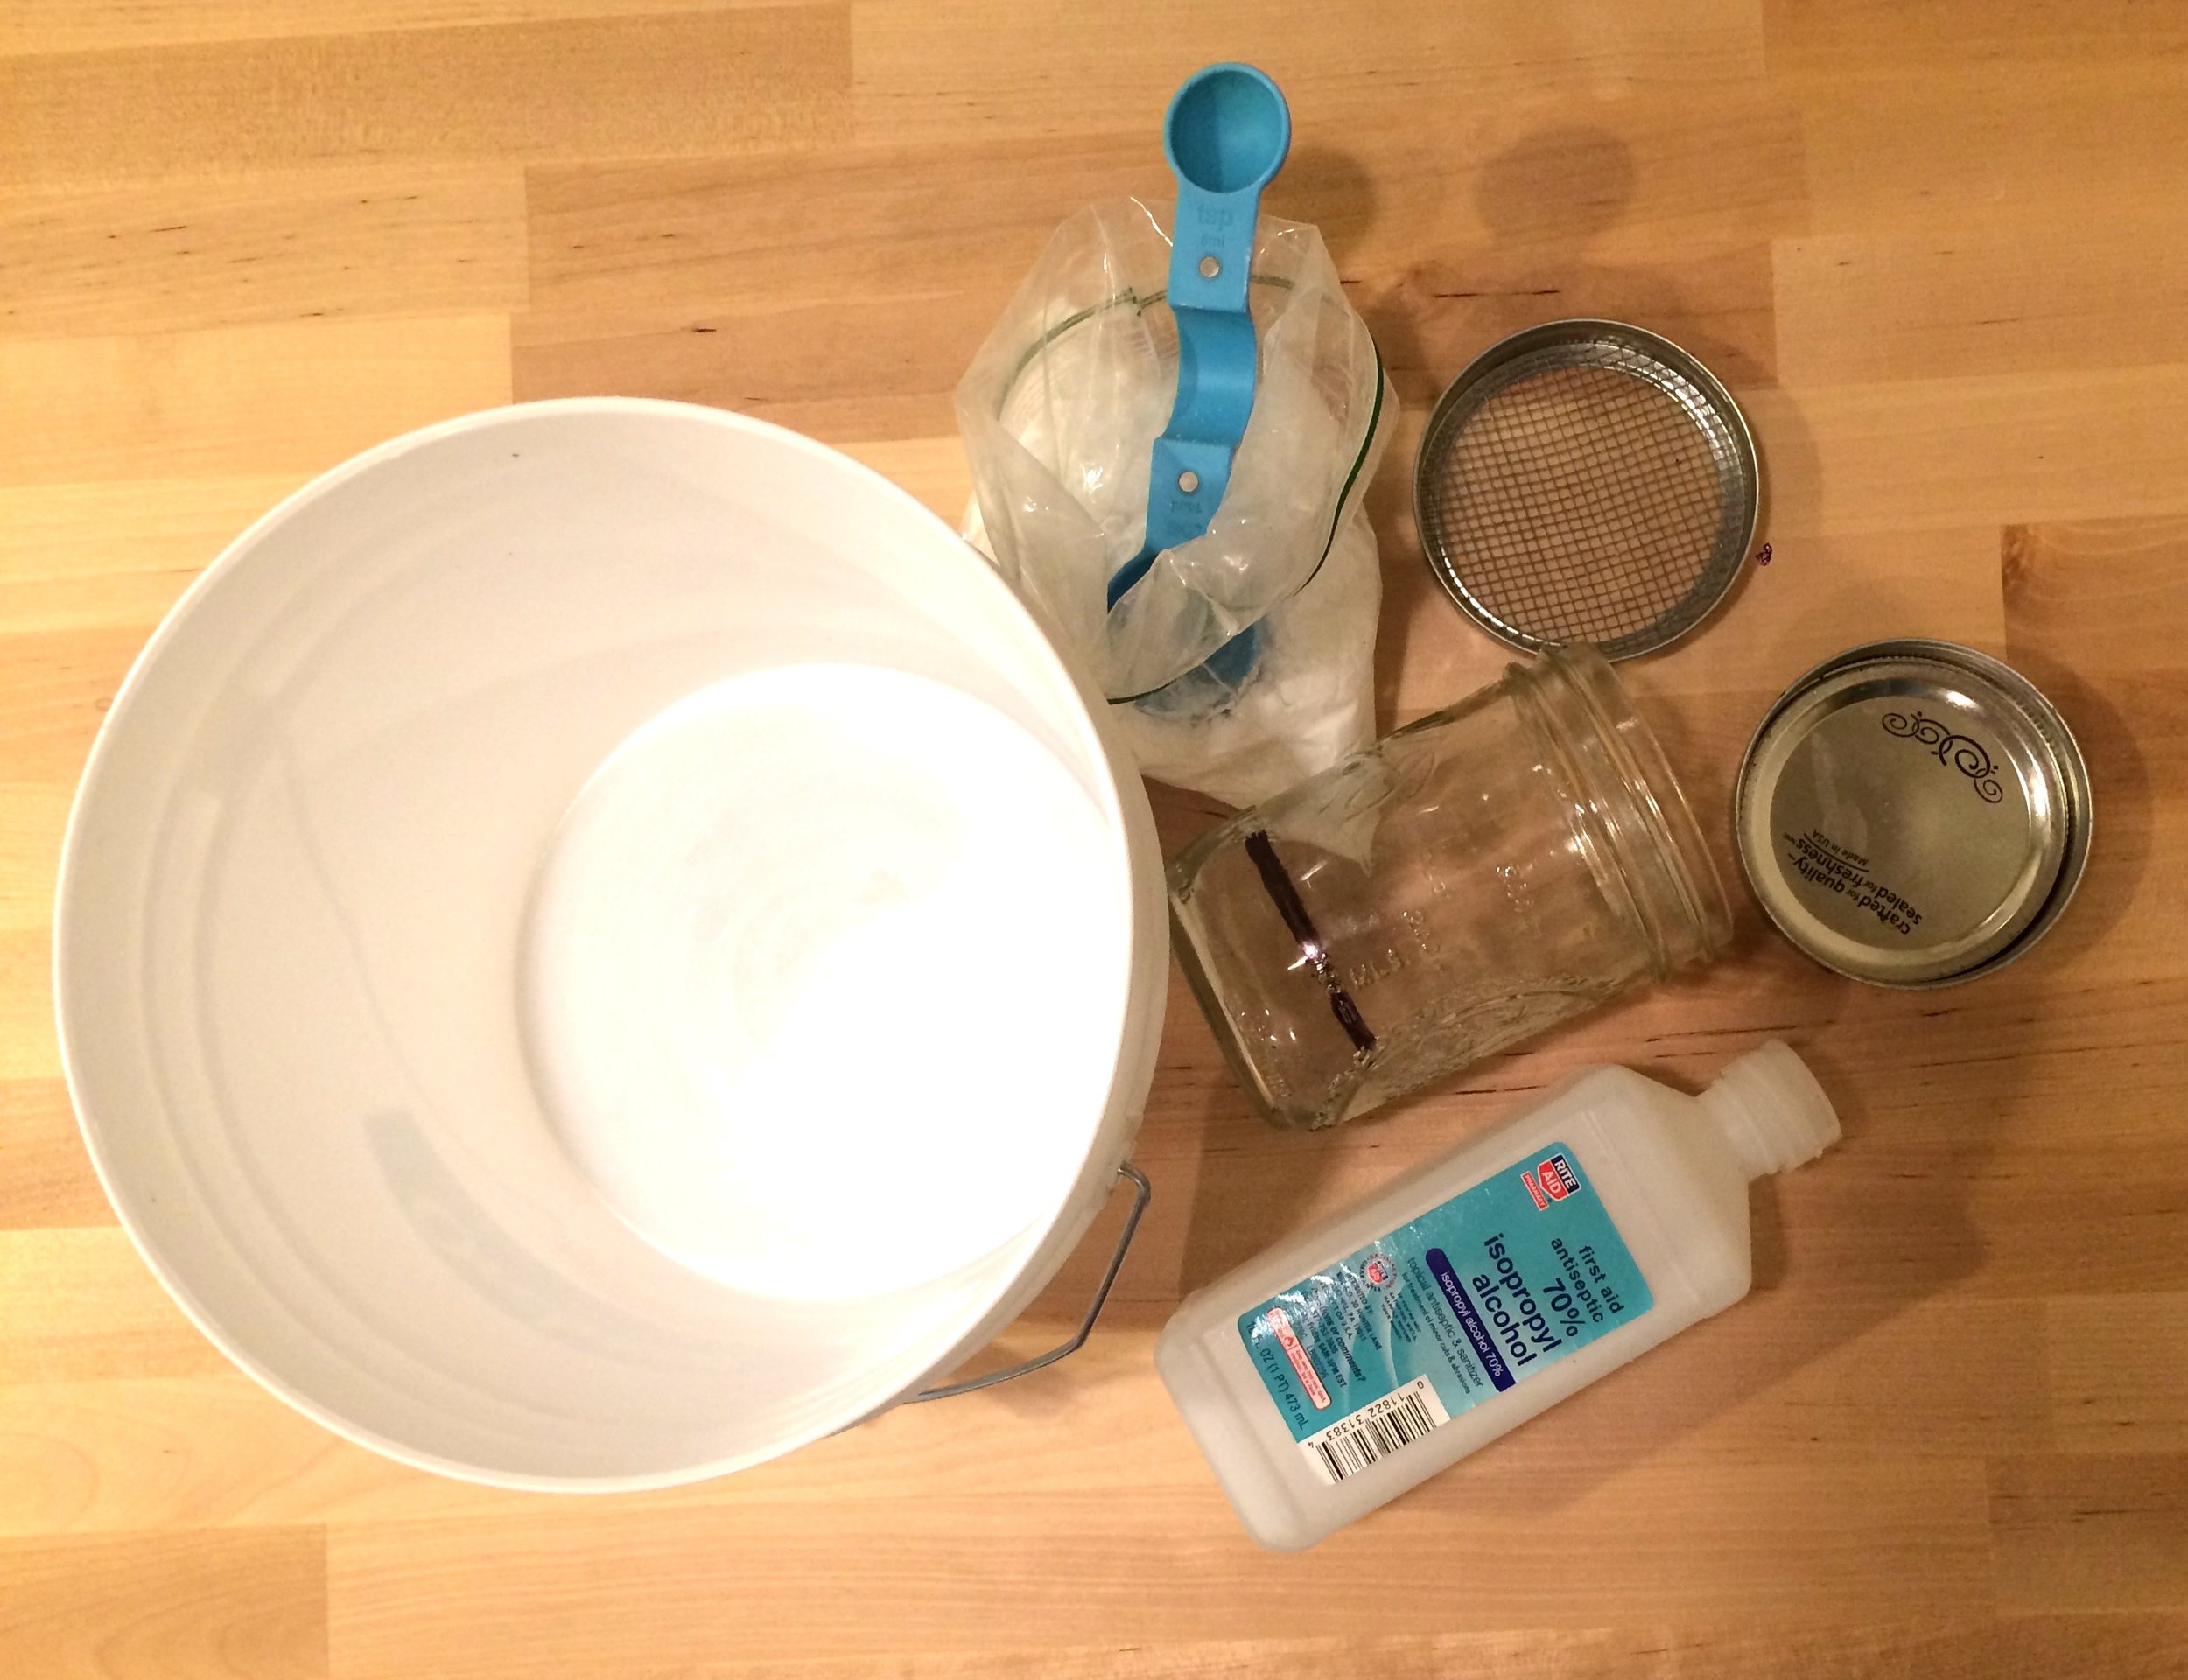
The Essential Mite Monitoring Kit
A mason jar fitted with ⅛ inch hardware cloth in the lid (mark your jar at the 100mL (~½ cup) waterline with a sharpie)
An additional solid lid for the mason jar
Powdered sugar (use a blender or food processor to make your own powdered sugar, free of cornstarch, which can be harmful to bee digestion)
A tablespoon
A spray bottle of water
Isopropyl alcohol
A small white bucket (use your bucket to hold your mite sample supplies)
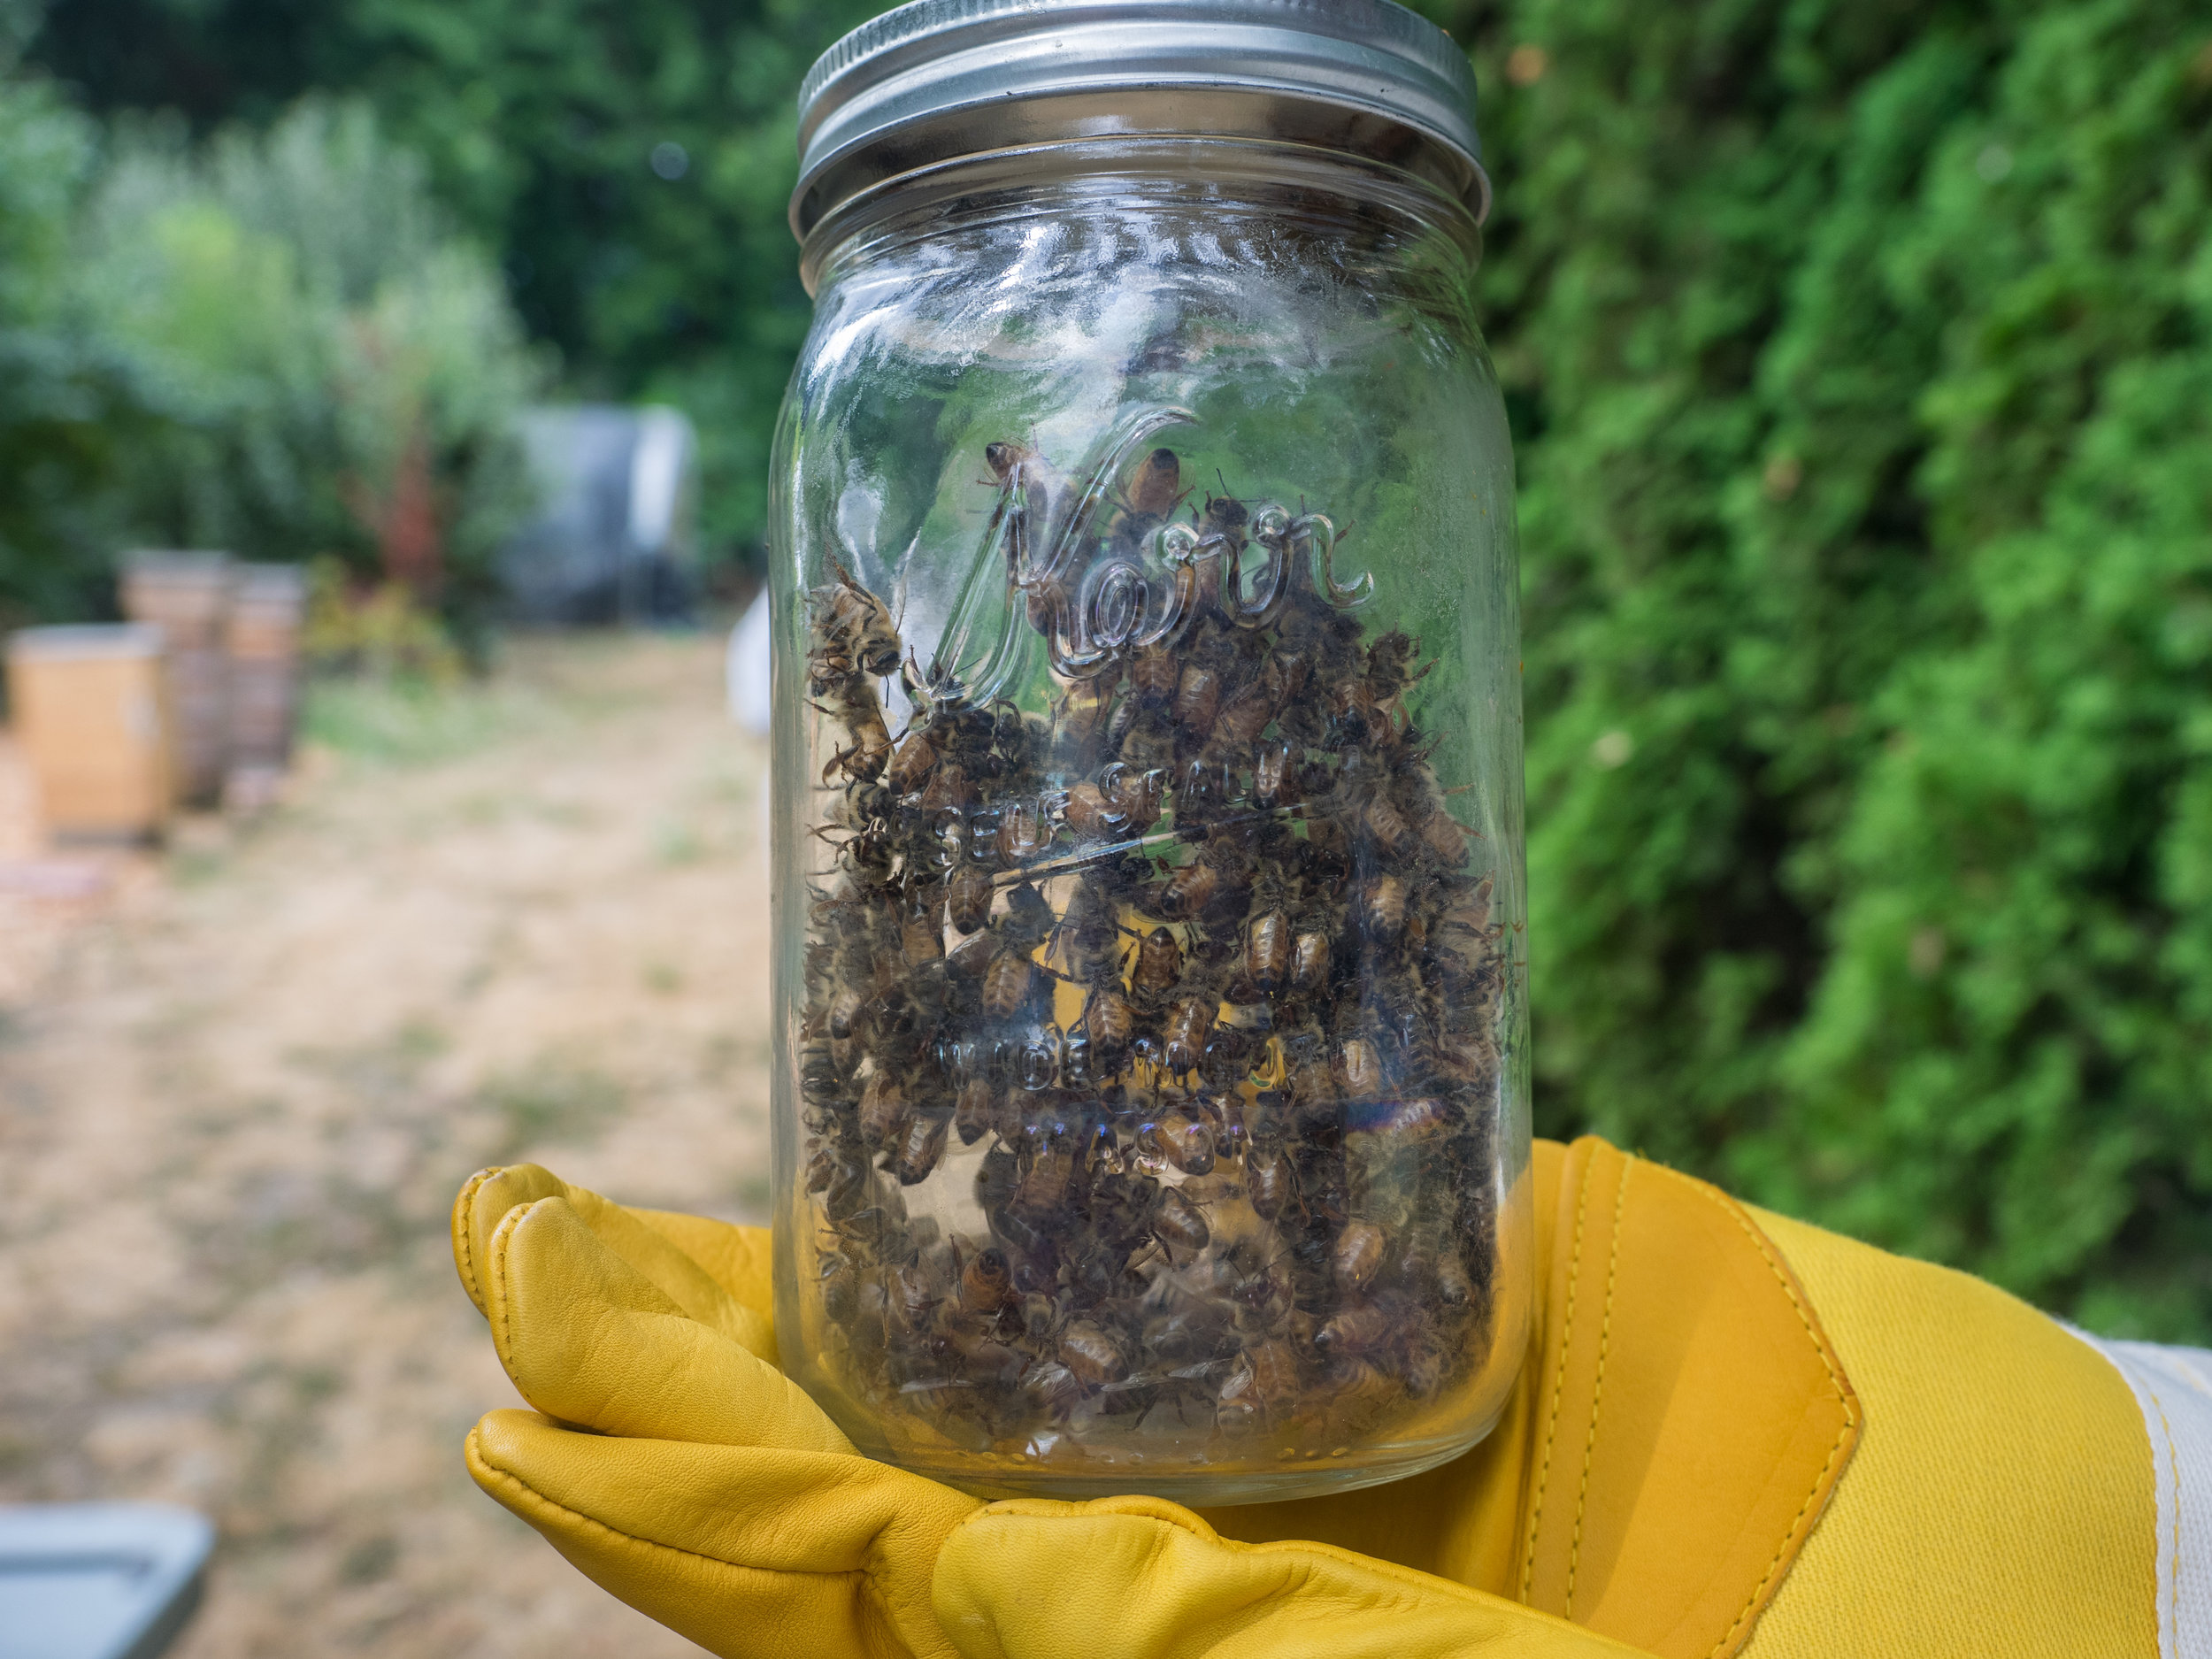
Both sugar rolls and alcohol washes will require gathering a 300 bee sample (about 100 mL or ½ cup), hence the sharpie line.
Here’s how you do it:
Select a comb in the heart of the brood nest that has both open and capped brood.
Before gathering your sample, double, and triple check the comb to be absolutely certain the queen is not on the comb you are collecting from!Brush bees off the comb and into the jar through a wide-mouthed funnel, OR lightly run the lip of the jar over their backs while keeping the comb vertical, and they will fall right in (and you look like a pro when you do it this way).
Cover the jar and tap it on the ground to knock them to the bottom until the sample reaches the line on the jar.
How to Perform a Sugar Roll
Gather your bee sample into the jar fitted with mesh lid
Sift 2 tablespoons of powdered sugar through the mesh and into the jar
Roll the bees in the jar until they are entirely coated in the sugar
Set the jar away from the hive in a shady spot for 2 minutes to allow the mites to dislodge from their bodies
Shake the jar (and the bees), covering the screen for 1 whole minute (use a timer!)
Shake the jar screen-side down over your bucket until you have gotten as much sugar as possible out of the jar
Dissolve the sugar in the bucket with water from your spray bottle
Count the number of mites floating in the bucket
Calculate percent infestation
Release your bees back into the hive after the test
Author’s note: Sugar rolls are most popular jar method of mite monitoring among hobbyist beekeepers because it does not directly kill your bee sample. Don’t, however, take that to mean sugar rolls aren’t a stressful experience for the bees and, as a result, the keeper. This test requires vigorously shaking a jar of live bees for a full minute, which feels longer than you’d expect! I’ve even noticed that after releasing the tested bees back into the hive, their mortician sisters prematurely drag them out, ghost white, and still living. This is why I prefer the alcohol wash (stay tuned), which is a much quicker, and in my opinion, less stressful experience for all parties.
How to Perform an Alcohol Wash
Gather your bee sample into the jar fitted with mesh lid
Pour isopropyl alcohol into the jar through the hardware cloth until your bee sample is covered, and swirl until they are dead
Switch to the solid mason jar lid and shake the sample for 1 full minute (set a timer!)
Switch back to the mesh lid and pour the alcohol out of the sample into a white bowl or bucket
Count the number of floating mites
Calculate percent infestation
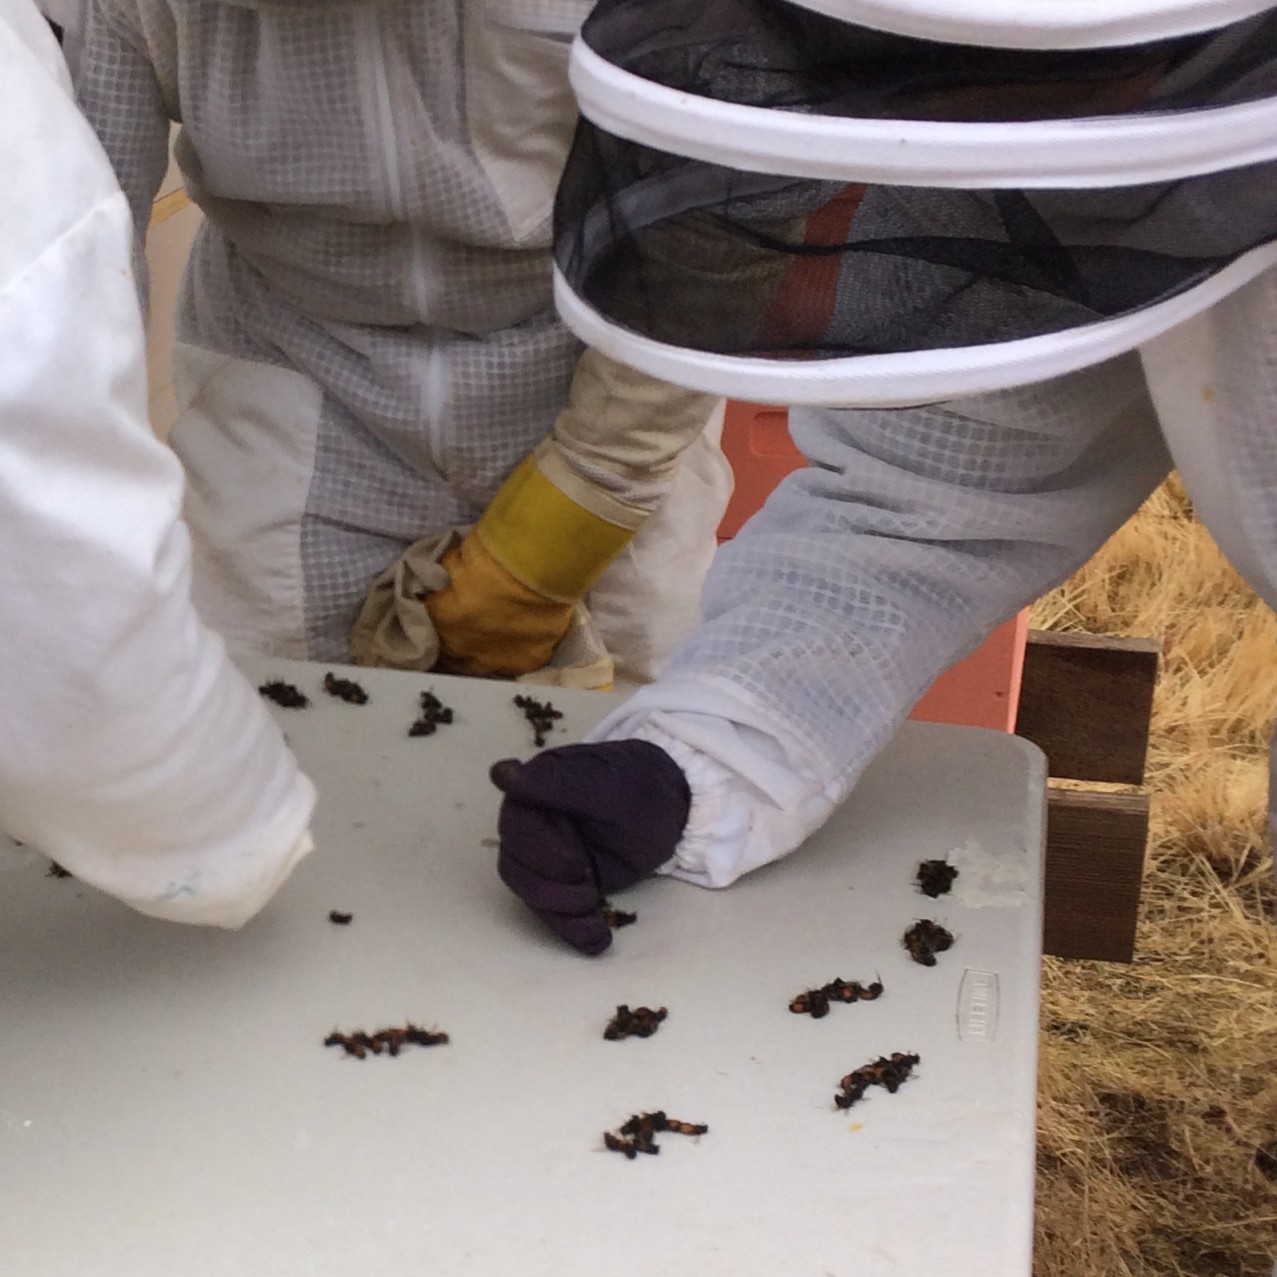
Author’s note: Alcohol washes are my preferred method of mite monitoring due to their accuracy, and because they are quick, easy, and less stressful for the keeper and the honey bee colony. They do require you to kill your bee sample (a worthy cause if you catch a mite problem early enough to save the whole colony), but this only takes a few seconds. After gathering your sample, you can close the hive and do not need to worry that the jarred bees are setting off alarming pheromones. Additionally, you don’t need to tax the rest of the colony by returning stressed out, half-dead, and sugar covered bees to the hive after sampling.
Calculate Percent Mite Infestation
[# of mites ÷ # of bees (~300)] × 100 = % infestation
OR
# of mites ÷ 3 = % infestation
So, now I can monitor. What’s next?
If your mite count is below threshold, there is no follow up required! Test again at the next seasonal benchmark, or if you notice other signs of deteriorating hive health. For now, you can rest easy. Additionally, if your hives are showing positive signs of keeping mites at bay on their own, they are great stock to expand your apiary by splitting!
Mite count above threshold? This is when things get a bit trickier. You will need to determine what you are willing to do to save your colony, if anything. At the Bee & Bloom apiaries, we forgo the use of chemical treatments, organic or synthetic. Since we have many hives, and a high degree of experience reading hive health, we have options for varroa control that backyard hobbyists - with only one or two hives - do not. For instance, we use tricks like initiating artificial brood breaks, using drone foundation traps, robbing screens, requeening, and allowing swarming as methods of mite control when populations are above threshold (we DO monitor).
If these options aren’t feasible for you, or if your hive is too overrun with mites for these options to make a dent in their populations, you may decide to use miticides to save your hives, and no one should look down on you for that. In the grand scheme of things, we hope to promote and work toward completely natural, treatment-free, and Darwinian beekeeping practices in the greater community - but for now, the most important thing for a hobbyist is that beekeeping be fun (or at least enjoyable) most of the time. I can tell you firsthand, losing colonies to varroosis is not fun! Never fear, though, because over time, you will find a method or combination of mite control you feel comfortable with.
Shameless Plug!
Are you a Portland local? You can hire a Bee & Bloom consultant to walk you through this process! Learn more about our services here.
And stay tuned for our next posts on cultural and mechanical treatments for varroa, and chemical treatments for varroa.
———
If you are just getting started in beekeeping (or hoping to soon!), check out our online Beekeeping for Beginners course here! Our comprehensive beginning course is designed to equip you with everything you need to get started in beekeeping from the comfort of your own home.